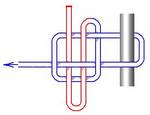
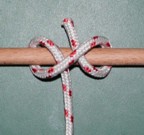
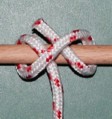
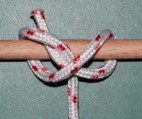
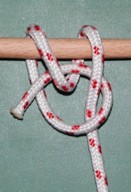
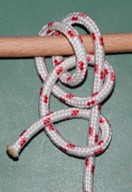
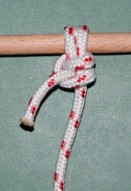
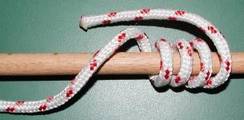
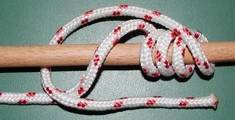
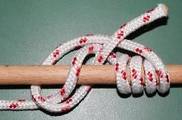
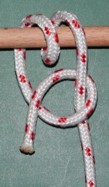
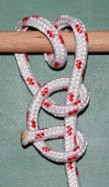
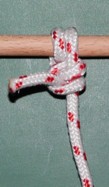
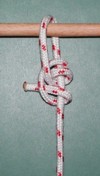
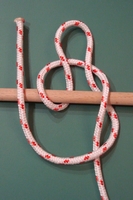
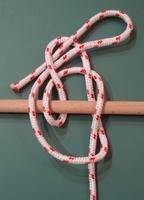
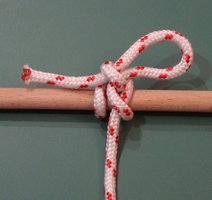
This is a quick, easy, secure, and versatile hitch. I tend to wrap the working end twice around the main part of the rope, as in the pictures. But for more security and gripping power, make three wraps around the main part of the rope, as in the KnotMaker drawing.
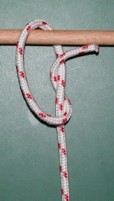 -1
-1
 -2
-2
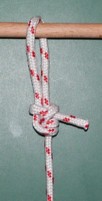 -3
-3
KnotMaker drawing of picture 2 (with three wraps instead of two):
This knot is easy to tie, and it grips better than many other hitches. The beauty of this knot, and several other knots on this page, is that you can slide it up or down the rope (in order to tighten a tent rope, for example) and it will continue to grip wherever it's moved. The Tarbuck Knot and the Tautline Hitch (Midshipman's Hitch) are also good slide-and-grip knots, but in my experience they're not as easy to dress and set as the Adjustable Grip Hitch, and they don't seem to grip as well.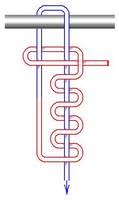
According to Budworth, "This practical slide-and-grip knot can be grasped and shifted easily by hand in either direction but locks up firmly under load. After the load is removed, the knot may be slid along the rope again. The momentum of a fall will cause the knot to slide and so absorb energy. ... Later tests involving 5.5-mm (1/4-in) Kevlar indicated that, when used as adjustable bends, these knots grip (i.e., do not slip) and break at around 80% of the absolute rupture load of the material used. This figure may be an underestimate." (The Complete Book of Knots, p.95).
To make it easier to untie, you can "slip" the knot. In other words, instead of passing the end of the rope through the knot when completing the knot, push a bight (a doubled rope) through instead. For more on "slipping" a knot, see the Slip Knot.
The Back Hand Hitch is an easy way to pass a rope once around an object and yet create two loops for a double hold on the object.
 -1
-1
 -2
-2
 -3
-3
 -4
-4
KnotMaker drawing of picture 3:
This is an easy way to form a double loop around an object for extra security. However, the drawback is that if it's not drawn up snugly then it might create a lot of friction where the rope rubs against itself, which can damage and weaken the rope. Also see the Axle Hitch.
Later I might add pictures for every hitch and binding knot which is related to the Clove Hitch and the Constrictor Knot and so on, but for now here's a link to the Wikipedia article about the Boa Knot.
Later I might add pictures for every hitch and binding knot which is related to the Clove Hitch and the Constrictor Knot and so on, but for now here's a link to the Wikipedia article about the Boom Hitch.
This is an example of tying a Clove Hitch around the main part of the rope, and it's essentially a reversed Two Half Hitches.
 -1
-1
 -2
-2
KnotMaker drawing of picture 1:
Since the second Half Hitch that you tie is jammed inside of the first Half Hitch, this is a more secure knot than Two Half Hitches. However, it can be difficult to untie unless it's "slipped" (for an example of "slipping" a knot, see the Slip Knot).
Later I might add pictures for every hitch and binding knot which is related to the Clove Hitch and the Constrictor Knot and so on, but for now here's a link to an article about the Camel Hitch.
The Clove Hitch is a popular hitch that's easy to tie, but it's not considered to be as secure as some of the other hitches. This is essentially Two Half Hitches tied around an object.
 -1
-1
 -2
-2
KnotMaker drawing of picture 1:
According to Budworth, "If pulled around, the clove hitch can work loose. Perversely, it can also jam when wet. Its breaking strength is variously quoted as between 60% and 75%." (The Complete Book of Knots, p.48).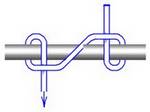
The Constrictor Knot is often considered to be the best and most secure of all of the binding type of knots. Budworth says that "This is the best of all binding knots." (The Complete Book of Knots, p.136).
To tie this knot, start with a Clove Hitch as in picture 1, then bring the end of the rope back through the first turn (picture 2). Dress and set the knot (picture 3).
 -1
-1
 -2
-2
 -3
-3
KnotMaker drawing of picture 2:
When the Constrictor Knot is tied on a convex surface such as a post, it grips like a boa-constrictor (which is how it got its name). However, it can be very difficult to untie this knot.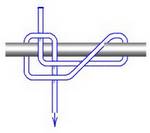
Later I might add pictures of every binding knot, but for now here's a link to the Wikipedia article about the Corned Beef Knot.
The Fisherman's Bend is actually a hitch, not a bend. Compare this with the Round Turn and Two Half Hitches (below).
 -1
-1
 -2
-2
 -3
-3
KnotMaker drawing of picture 2:
According to Budworth, "this knot is misleadingly named. It is actually a strong-ish (70-75%) and secure hitch for wet and slimy conditions." (The Complete Book of Knots, p.53).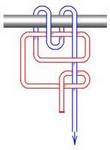
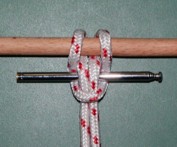
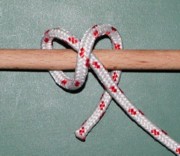
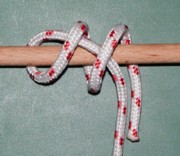
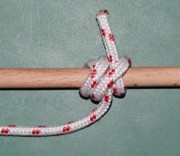
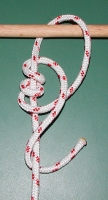
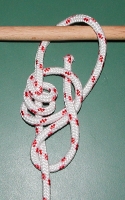
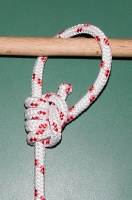
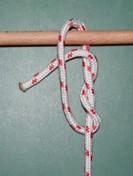
This hitch grips well when tied around another rope, or when tied around a smooth (or tapered) surface such as a rod or a spar. First make several round turns as in picture 1, then bring the end of the rope back towards the left over the tops of the round turns (picture 1). Bring the end of the rope down behind the rod, then bring it between the rod and the main part of the rope (picture 2). Now bring the end of the rope up behind the rod between the rod and the two strands of rope as in picture 3. Dress and set the knot (picture 4). The pull on the rope should be from the left, as in picture 4.
 -1
-1
 -2
-2
 -3
-3
 -4
-4
KnotMaker drawing of picture 3:
Also see this article about the Icicle Hitch.
Later I might add pictures for every hitch and binding knot which is related to the Clove Hitch and the Constrictor Knot and so on, but for now here's a link to the Wikipedia article about the Ground Line Hitch.
See the Siberian Hitch (below).
This is a quick-release hitch which easily comes apart when you pull the end of the rope. To tie this knot, pass a bight (a doubled rope) around the object (picture 1), then take the main part of the rope and push a bight through the first bight (picture 2). Now take the end of the rope and push a bight through the second bight (picture 3), and tighten the knot (picture 4). When you need to untie the hitch, simply pull the end of the rope and the quick-release knot will completely fall apart.
 -1
-1
 -2
-2
 -3
-3
 -4
-4
KnotMaker drawing of picture 3:
This knot can easily come apart when you pull on the main part of the rope, and therefore it should be avoided. For a better quick-release knot, see the Tumble Hitch (below).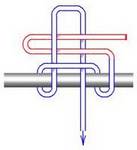
Later I might add pictures for every hitch and binding knot which is related to the Clove Hitch and the Constrictor Knot and so on, but for now here's a link to an article about the Icicle Hitch.
Also see the Gripping Sailor's Hitch (above).
This is generally considered to be one of the least secure hitches.
The pull needs to come equally from both ends of the rope in order for this knot to be fairly secure. If the pull will only come from one end of the rope then pass the other end of the rope through the hitch to help secure it. This variation is often called the Pedigree Cow Hitch:
If both ends of the rope are already attached to something then you can create the Lark's Head Hitch by using an object as a toggle:
Later I might add pictures for every hitch and binding knot which is related to the Clove Hitch and the Constrictor Knot and so on, but for now here's a link to the Wikipedia article about the Miller's Knot.
Later I might add pictures for every hitch and binding knot which is related to the Clove Hitch and the Constrictor Knot and so on, but for now here's a link to the Wikipedia article about the Ossel Hitch.
Later I might add pictures of every binding knot, but for now here's a link to the Wikipedia article about the Packer's Knot.
If the top of a post is available then you can simply wrap a bight of rope (a doubled rope) around the post and then throw the loop over the top of the post.
 -1
-1
 -2
-2
The Rolling Hitch is similar to the Clove Hitch (above), but it's considered to be more secure than the Clove Hitch.
 -1
-1
 -2
-2
 -3
-3
KnotMaker drawing of picture 3:
According to Budworth, the pull on the rope needs to be in the direction shown in picture 3 (The Complete Book of Knots, p.49).
Also see this Wikipedia article for some more rolling hitches.
This is considered to be a good hitch in most circumstances. Compare this with the Fisherman's Bend (above).
 -1
-1
 -2
-2
 -3
-3
KnotMaker drawing of picture 2:
According to Budworth, "The two half-hitches have a breaking strength of 60-75%, but the round turn may increase that percentage." (The Complete Book of Knots, p.52).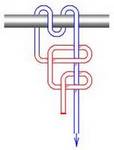
Method #1
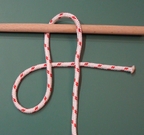
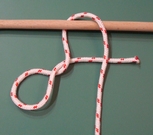
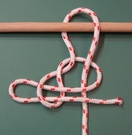
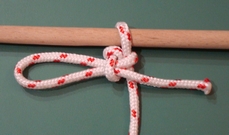
Pass the end of the rope around an object, then form a loop and bring the end of the rope to the right behind the two vertical strands of rope as in picture 1. Grab the loop and give it an extra twist, forming an "elbow" (picture 2). Bring the end of the rope to the left, on top of the main part of the rope, then make a
bight
in the end of the rope and push it through the loop (picture 3). This creates a "slipped" Siberian Hitch. Dress and set the knot (picture 4). To tie a Halter Hitch, skip the extra twist in picture 2.
 -1
-1
 -2
-2
 -3
-3
 -4
-4
Method #2
For another way to tie the Siberian Hitch, see
Siberian hitch.
There's not a lot of information about the Siberian Hitch or the Halter Hitch out there, but here are some thoughts that I've gathered from various sources: The Siberian Hitch probably provides more security/stability than the Halter Hitch. The Buntline Hitch is perhaps more stable than the Siberian Hitch, mainly in situations where the rope will be repeatedly tensioned and released. The Siberian Hitch is easier for some people to tie (especially in cold weather with gloves on) than the Buntline Hitch, and it's easier to snug the Siberian Hitch up against an object because both hands tend to be needed in order to work the Buntline Hitch all the way up to the object. However, if the tension on the rope is reduced then the Siberian Hitch can relax its grip around the object to some degree, whereas the Buntline Hitch tends to maintain its grip around the object even when the tension on the rope is released.
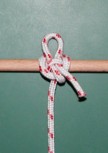
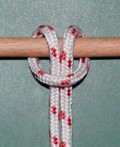
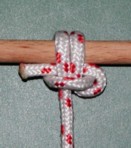
This slide-and-grip knot is fairly easy to tie, and it has the added feature of being able to be locked into place. In addition, it's an "exploding" knot because when the end of the rope is pulled, the knot will fall completely apart. This knot is described in greater detail, along with several other "exploding" knots, at Six Exploding Knots.
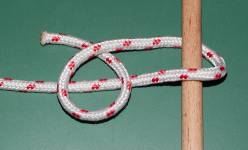
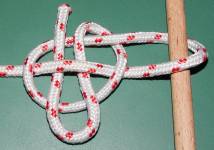
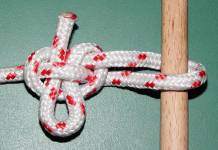
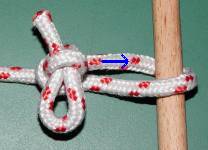
To tie this knot, bring the end of the rope around and under itself to form a loop, then place that loop on top of the main part of the rope (picture 1). Now create a bight of rope in the end of the rope, then push that bight under the main part of the rope and over the other side of the loop, as in picture 2. Dress and set the knot as in picture 3, then slide the knot to the desired position on the main part of the rope. When the knot is in position, hold the knot while pulling the strand of rope which is indicated with a blue arrow in picture 4 (pull the rope in the direction that the arrow is pointing). This will create a "hump" in the main part of the rope, which will lock the knot into place (compare pictures 3 and 4). To unlock the knot in order to slide it up or down the main part of the rope, simply loosen the knot until it looks like picture 3 again.
 -1
-1
 -2
-2
 -3
-3
 -4
-4
KnotMaker drawing of picture 2:
Later I might add pictures for every hitch and binding knot which is related to the Clove Hitch and the Constrictor Knot and so on, but for now here's a link to the Wikipedia article about the Snuggle Hitch.
Later I might add pictures for every hitch and binding knot which is related to the Clove Hitch and the Constrictor Knot and so on, but for now here's a link to the Wikipedia article about the Strangle Knot.
This is another slide-and-grip knot. Personally, I find that the Adjustable Grip Hitch grips better and is easier to tie and dress and set than the Tarbuck Knot.
 -1
-1
 -2
-2
 -3
-3
KnotMaker drawing of picture 2:
According to Budworth, "There is only one right way to tie this knot but many wrong ways. Work the entire knot snug before use." (The Complete Book of Knots, p.67).
This is another slide-and-grip knot. Personally, I find that the Adjustable Grip Hitch grips better and is easier to tie and dress and set than the Tautline Hitch.
 -1
-1
 -2
-2
 -3
-3
KnotMaker drawing of picture 2:
This is similar to the Highwayman's Hitch (above), but it appears to provide better stability.
Pass a bight across the object (picture 1), then make a bight in the end of the rope and pass it around the object and through the first bight (picture 2). Bring the end of the rope around and on top of the main part of the rope, then bring it over the object just as you passed the first bight over the object (picture 3). Make a bight in the end of the rope, then pass it through the bight which you created in the second picture in the direction shown in picture 4. Carefully dress and set the knot (picture 5). When you pull the "ripcord" (the end of the rope) then the knot will "explode," meaning that the rope will be completely removed from the object.
 -1
-1
 -2
-2
 -3
-3
 -4
-4
 -5
-5
This knot is better suited for non-critical applications (since a tug on the end of the rope could prove disastrous), and for loads which won't put a heavy strain on the rope (since a heavy strain might cause the "ripcord" to become difficult to pull out).
This knot was devised by Dan Lehman, and it's discussed (along with some other quick-release ideas) in the forum topic called Highwayman's Hitch Improvements at the International Guild of Knot Tyers.
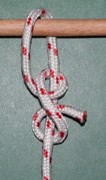
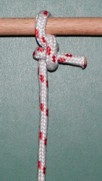
This is an example of tying a Clove Hitch around the main part of the rope. Compare this with the Back Hand Hitch, the Buntline Hitch, the Clove Hitch, the Constrictor Knot, the Fisherman's Bend, and the Round Turn and Two Half Hitches.
 -1
-1
 -2
-2
KnotMaker drawing of picture 1:
Later I might add pictures for every hitch and binding knot which is related to the Clove Hitch and the Constrictor Knot and so on, but for now here's a link to the Wikipedia article about the Vibration-proof Hitch.
